- The options are for the person to press 1 to connect to a live person or press 9 to be added to the do not call list.
- Record a message. See the “How to record a message” section to do this.
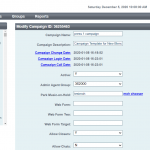
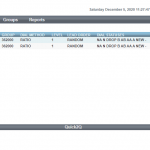
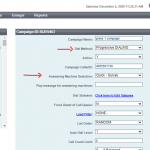
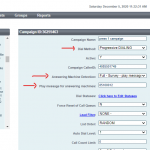
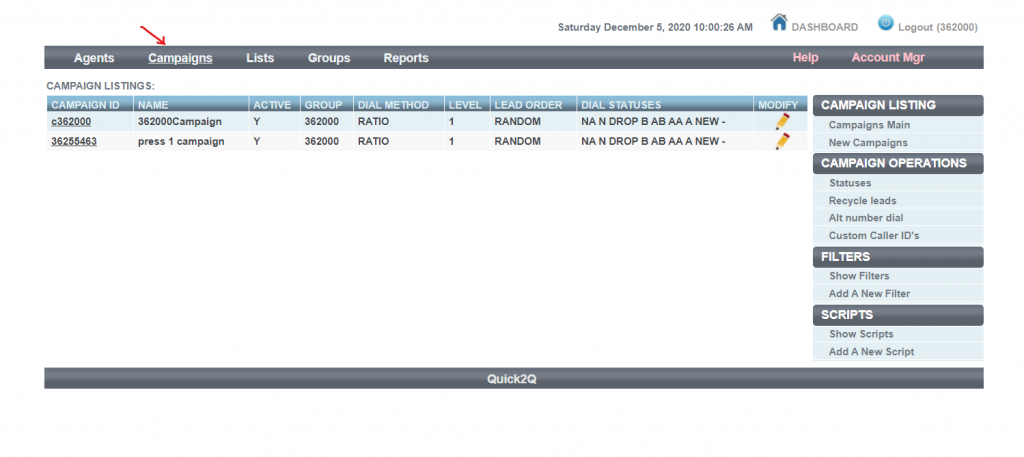
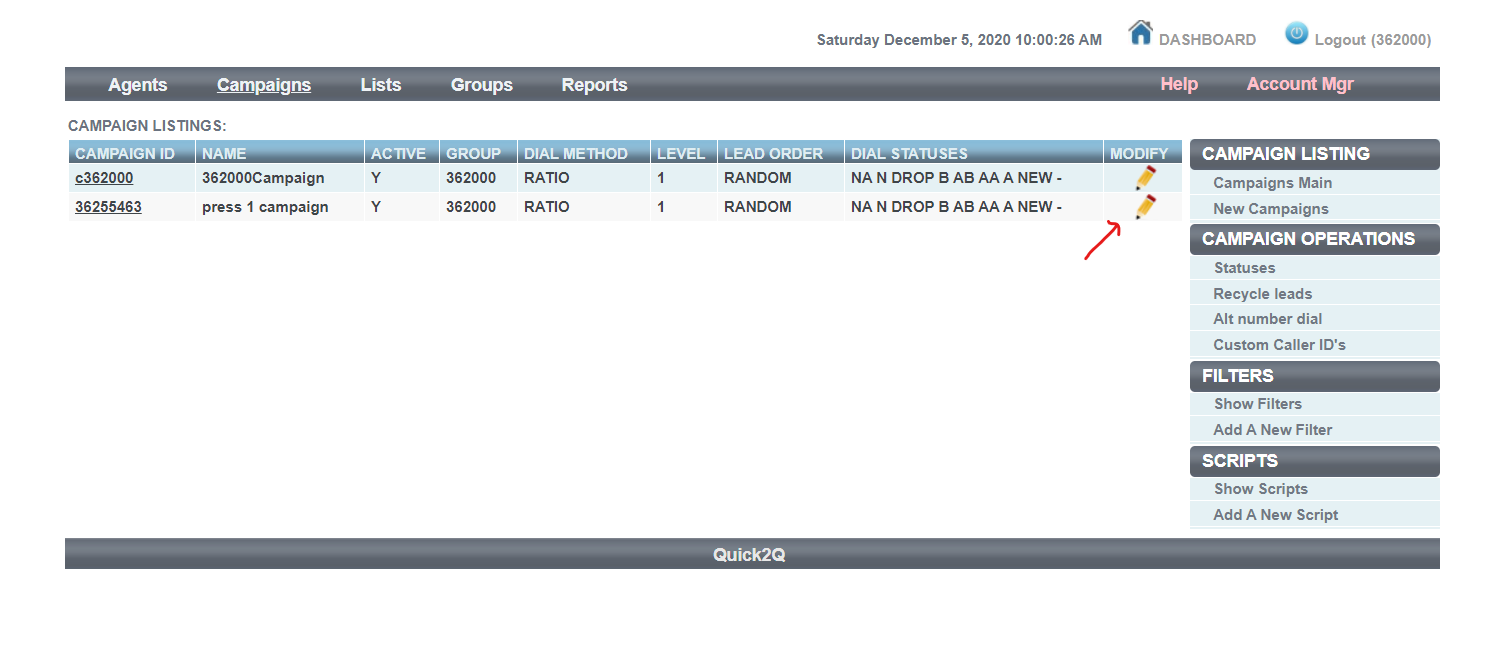
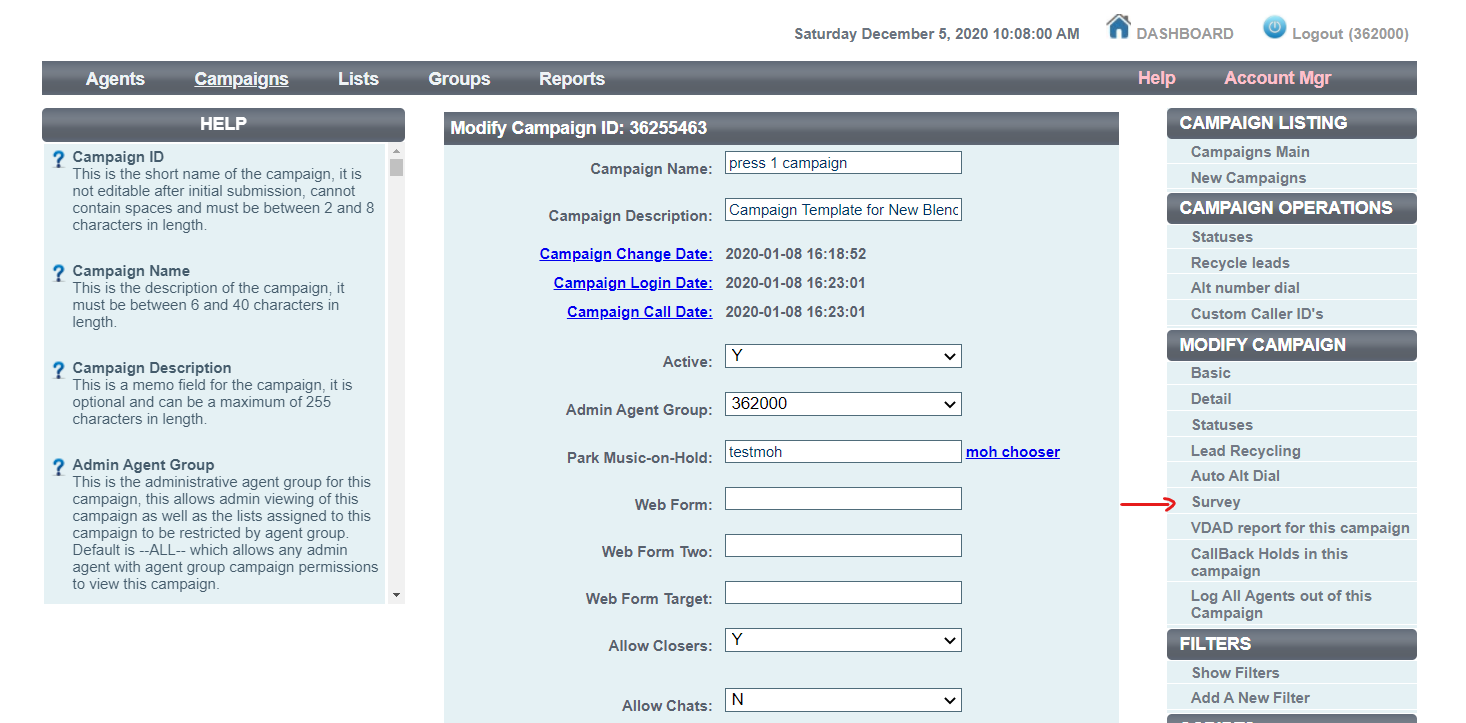
- Log into your Admin account and go to Campaigns->(CAMPAIGN ID – Press 1 Campaign)->Detail->Survey. The picts below will help navigate you to the location.
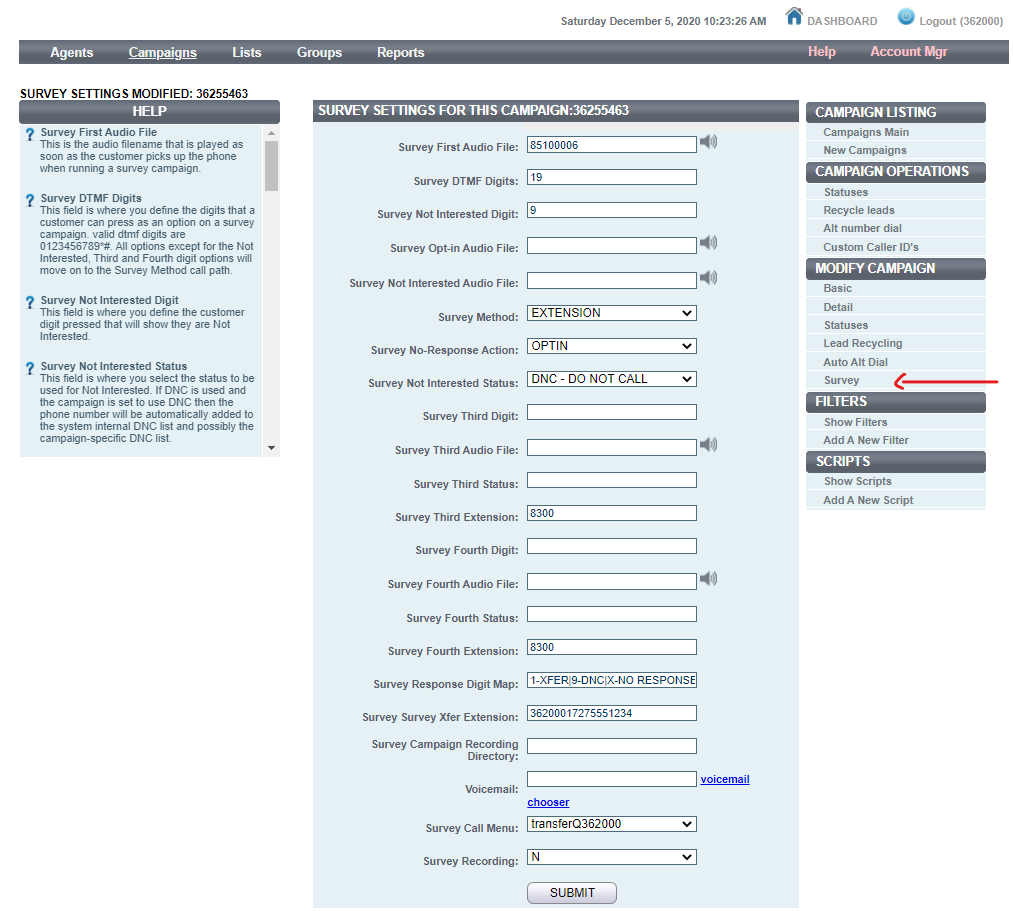
- Survey First Audio File: (8 digit record message) Message to be played for auto dial which may include press digit options.
- Survey DTMF Digits: 19 (in this example we are using 2 press digit options 1 and 9)
- Survey Not Interested Digit 9 (the press 9 digit will be use for the “Survey Not Interested Status” option)
- Survey Opt-in Audio File: (blank)
- Survey Not Interested Audio File: (blank)
- Survey Method: EXTENSION ( When caller presses 1, this option enables an external phone to be called using the “Survey Survey Xfer Extension” field below. AGENT_XFER option will send the call to the next active agent.
- Survey No-Response Action: OPTIN
- Survey Not Interested Status: DNC (When 9 is pressed, the record will be marked as Do Not Call)
- Survey Response Digit Map: 1-XFER|9-DNC|X-NO RESPONSE| (shows in export calls report in security phrase field)
- Survey Survey Xfer Extension: user admin id + 1 + 10 digit number to dial (number dialed with press 1)
- All other field can be default or blank Setup remote agent.
- Setup remote agent. This is for starting the auto dial without logging into an agent.
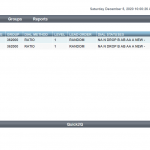
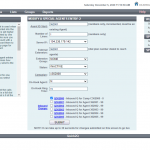
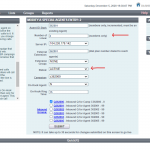
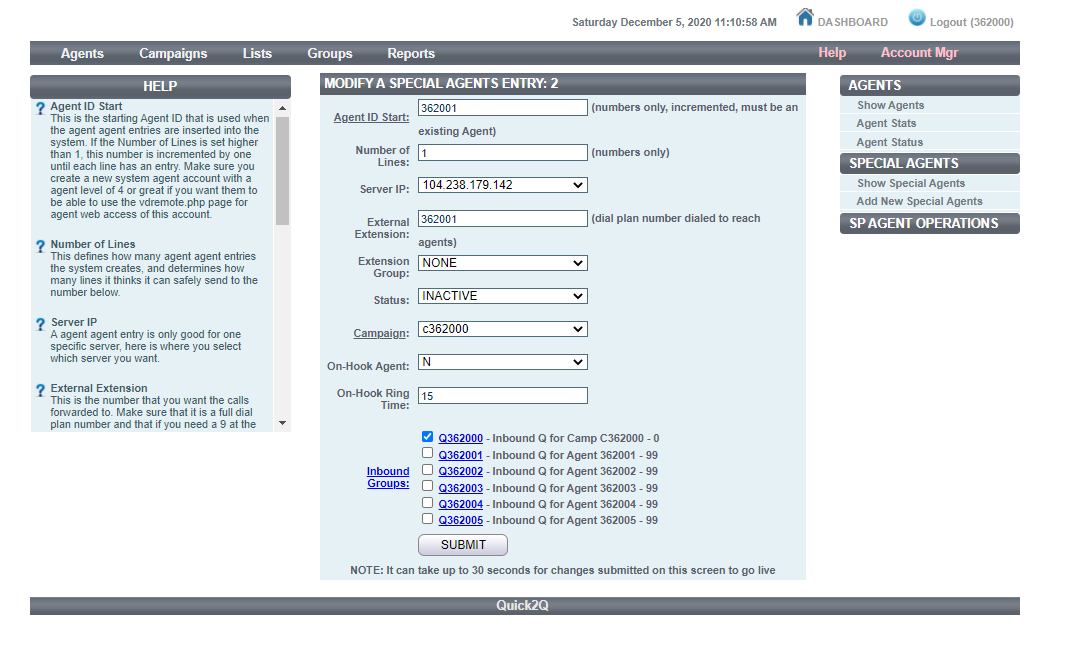
Go to Agents->Add New Special Agents
- Agent ID Start: You must use one of the existing agent IDs
- Number of lines: 1 (number of lines to outdial)
- External Extension: same Agent ID as above
- Agent ID Start: INACTIVE
- Extension Group: NONE
- Campaign: to run with ACTIVE
- Select queue for campaign: (choose the press 1 campaign)
- On-Hook Agent: N
- On-Hook Ring Time: 15 (default value)
- Inbound Groups: select the checkbox for the top Inbound Q that ends in 000
Select SUBMIT to save your options
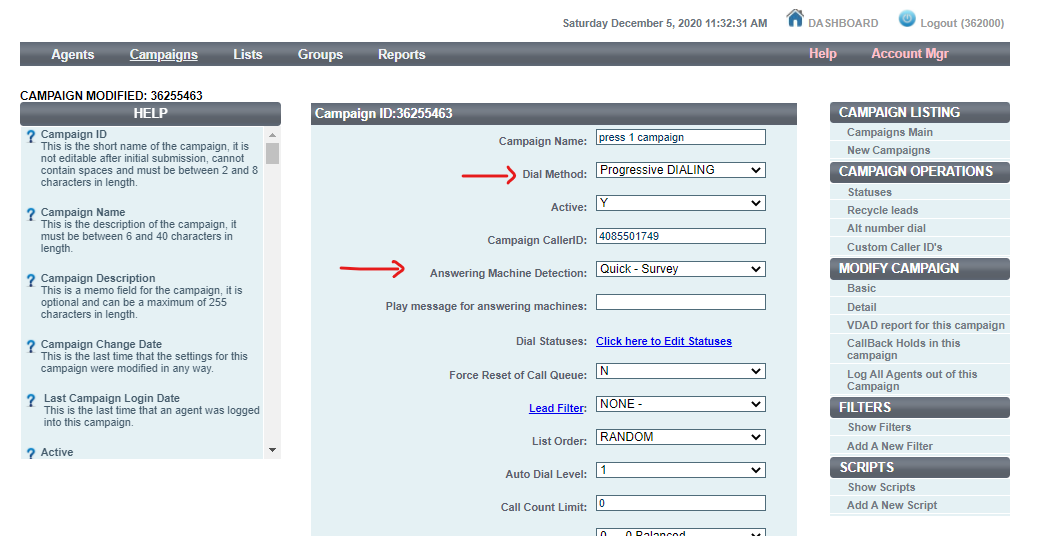
- To run the auto dial campaign and leave message on voicemail go to Campaigns->(CAMPAIGN ID of press 1 Campaign)and do the following.
- To play message to a live person and do NOT leave a message on voicemail.
- Set Dial Method: Progressive DIALING
- Set Answering Machine Detection: Quick – Survey
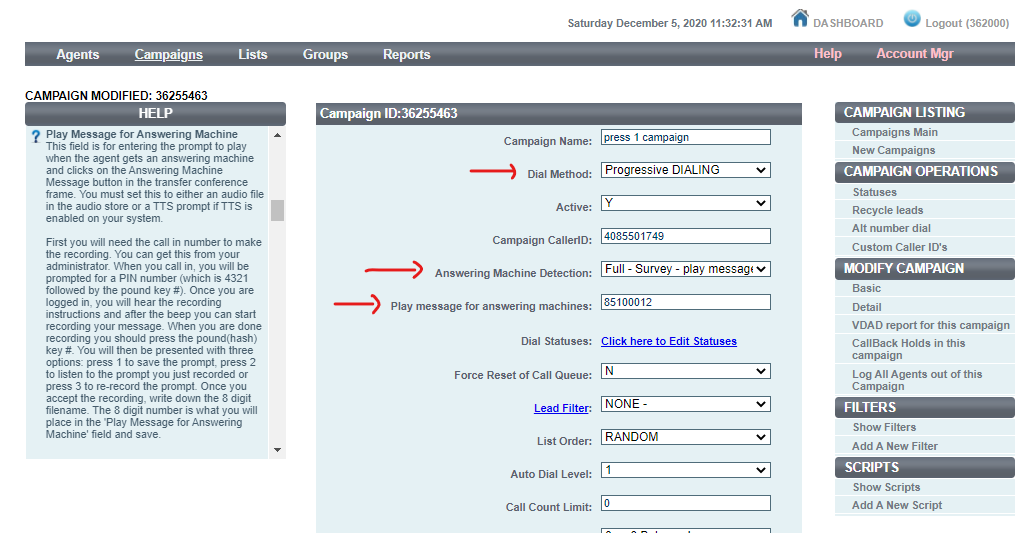
- To play message to a live person and leave a message on voicemail.
- Set Dial Method: Progressive DIALING
- Set Answering Machine Detection: Full – Survey – Play message to AM
- To get the campaign ready to dial you must first load your leads and activate the loaded list. See Help section “Basic Admin setup for outbound dialing” section 3 to load leads.
- To start the Auto dial campaign there are different ways of doing this depending on how the press 1 are going to be answered.
- How to start dialing for a press 1 campaign to an external number and have no logged in agents.
- This is where in step 2. “Survey Method” was set to EXTENSION and Step 4 Dial Method: was set to PROGRESSIVE DIALING
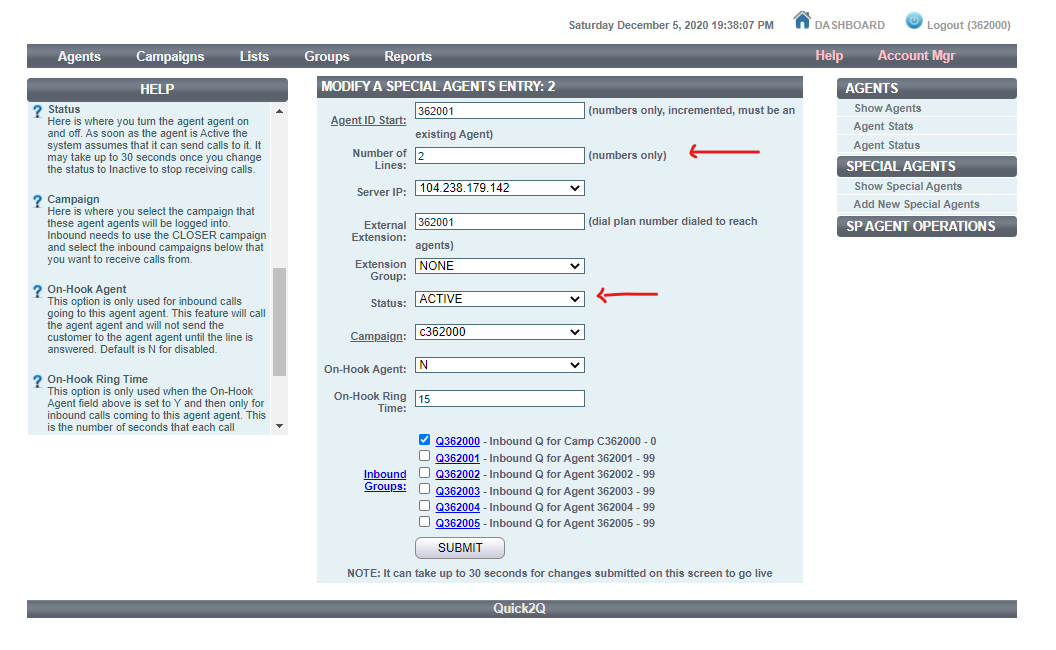
- To start dialing go to Agents->Show New Special Agents->MODIFY
- Set Number of Lines: (set to the number of lines you want to start)
- Set Status: ACTIVE
- To stop Dialing Set Status: INACTIVE
- How to start dialing for a press 1 campaign for logged in agents.
- This is where in step 2. “Survey Method” was set to AGENT_XFER and Step 4 Dial Method: was set to PREDICTIVE DIALING
- Set Campaigns->(Press 1 campaign)->Detail->Allowed Inbound Groups: Q420000
- To start dialing, login as an agent into the Press 1 Campaign and set to Active. On the admin dashboard LINES PER AGENT dropdown controls the number of lines dialed and when a agent is on a call or paused the lines will stop dialing.
- How to start dialing for a press 1 campaign for agents that are PAUSED or ACTIVE to accept calls. Requires 2 agents and 2 campaigns.
- This is where in step 2. “Survey Method” was set to AGENT_XFER and Step 4 Dial Method: was set to PROGRESSIVE DIALING for Press 1 Campaign.
- Set Campaigns->362000Campaign (Non Press 1 campaign)->Detail->SurveyAgent In Queue Ringing: Y
- Set Campaigns->362000Campaign (Non Press 1 campaign)->Detail->Allowed Inbound Groups: Q420000
- Make sure there are no lists Active to dial for 362000Campaign (Non Press 1 campaign)
- Agents can then log into 326000 (Non Press 1 campaign). Do not use 1st agent (362001), this will be reserved as the special agent that will start the dialing.
- To start dialing go to Agents->Show New Special Agents->MODIFY (362001)
- Set Number of Lines: (set to the number of lines you want to start)
- Set Status: ACTIVE
- To stop Dialing Set Status: INACTIVE
- In this mode calls will not stop dialing when an agent answers a call.